The prone row (often called the seal row), is an exercise that many people use to grow their back musculature. However, to use it effectively, you do actually need to set it up correctly. The prone row can be a phenomenal exercise for developing the upper back, if performed correctly. Understanding how to set up the prone row effectively is actually very often skipped over, and people wonder why they don’t get the results they desire from the exercise. So in this article, we are going to discuss some of the basic points to keep in mind when setting up the prone row.
Prone Row (Seal Row) Proper Set Up
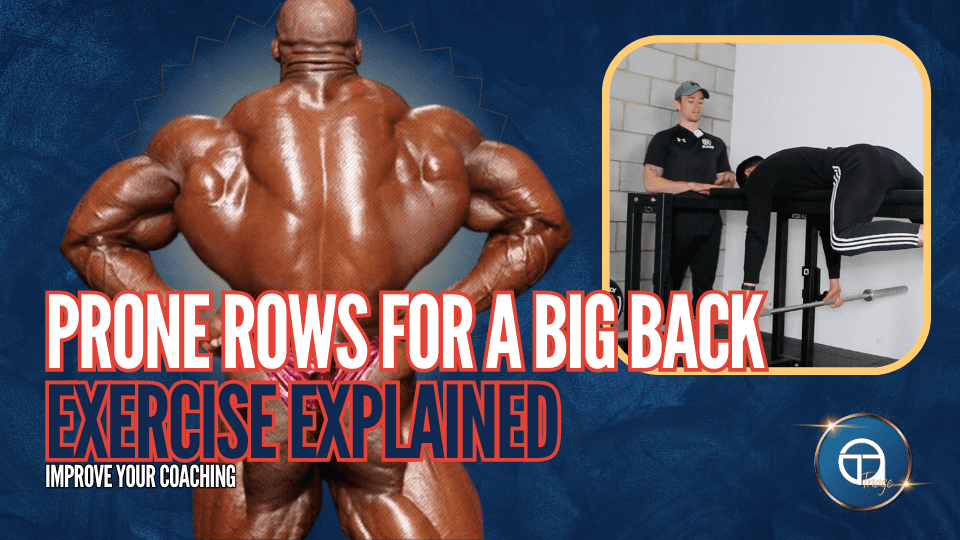
When you are setting the prone row up for your clients (or yourself), one of the things that I would pay attention to at the very beginning is making sure that the barbell starting position, relative to the bench height, is actually at an appropriate height for the individual. Someone could have been using it previously and they could have been a lot smaller or a lot bigger than your client. This is critically important, as you aren’t going to be able to set yourself (or your client) up correctly if the bar is too far away or too close to you to even pull the bar efficiently.
From there, what you want to do is get up onto the bench. There are a number of different ways you can set yourself up on the bench. Some prone row benches have a hole in them for the face, but some of them don’t actually have that set up. If the bench doesn’t have a hole you can just keep your head elevated a bit. Now, one of the things that we generally recommend here, especially if you’re working with stronger individuals, is to actually start to use your legs to support you. You can do this by wrapping the legs around the bench, and using them for more stability. The reason we do this is because, if your legs were just straight, then what ends up happening is, as you start to pull and you’re using really heavy weights, the legs can start to fly up because you’re not supporting them. This doesn’t happen and you have a lot more stability if you can start to brace by bringing the legs down, locking them in under the bench. Now, some prone rows will actually have a position for you to secure your feet, but not all of them do. So we like to generally recommend that you lock them in under the bench. To do this, we’re keeping the heels tucked in under the bench, we’ve got the thighs pressed in tight and hugging the bench, and then everything’s stable in the lower body. This allows us more capacity to produce force with the upper back muscles without being limited elsewhere.
From there, what you’re going to do or have your clients do is take a grip that is appropriate for your goal. If you’re trying to really bring the elbows nice and wide as you’re pulling up, then you’re going to have a wider hand grip. With the elbows out wider, that is going to put more of a challenge on the scapular muscles. With the elbows being further from the body, the lats aren’t going to be contributing quite as much, or at least not those lower lat fibres that are really responsible for that shoulder extension. You can bring the grip in closer as well, and have the hands in closer together which will mean the elbows stay slightly closer to the body as you row. That’s going to start biasing those lats a little bit more. But obviously, the upper back and scapular muscles are still working to a considerable degree.
Now one thing that is worth considering here is the way that we can start to really bias these lats. One of the problems that you might encounter here, if you’re really trying to get someone to keep the elbows close to the body and do that type of row where it’s more of a lat bias, is that it’s really difficult to do that in full pronation. If you’re using a barbell to perform the exercise, then it can be quite difficult to actually row back and keep the hands in that pronated position required to hold the bar. If we’re trying to keep the elbows close to the body as we row, it’s really difficult to achieve that full pronation of the radial ulnar joint with the elbow in that position. So either you will be forcing that joint into an uncomfortable position, or you are going to have to keep the elbows wider.
One thing that you can do to remedy that is actually adjust the grips that you’re working with. Firstly, you might have a bar in your gym, a football bar, that actually has grips that are more of a semi-supinated position. You can also obviously just use dumbbells where you have more freedom of movement, and that can be quite a comfortable way to do this exercise. However, it can be quite difficult to set up a prone row with dumbbells, as most prone row benches are not designed for use with dumbbells, and using a standard bench press for prone rows only really works if you are actually quite short (or at least have short arms). However, if you do wish to use dumbbells for the prone row, you can get two boxes on either side and place the dumbbells on those.
One really nice way to get more freedom of movement is to use additional handles and attach them to the bar. If you’ve got D-handles or cable handles in your gym that you would generally use for cable machines, especially if they’re quite robust, you can actually attach these to the barbell. With these, it is much easier to move those wrists in any direction you want, which can make this movement more enjoyable and easier to progress for a lot of people. With handles, you can even let the hands go from a pronated position as the weight is further away from you, to more or a neutral position as you row in, and this is a really nice way to start biasing those lats because you have the freedom to bring the elbows in close to the body. You could also do something along the lines of using Daisy chains that are used for climbing, or something else that you can attach to the actual barbell, and you could attach your handles using that. However, in general, most handles will be robust enough to handle the load by simply looping them over the bar.
One of the big benefits of an exercise like this versus something like a bent-over barbell row is that the prone row doesn’t really demand much of the lower body here. It doesn’t demand much of the lower back. So we can start to focus on having a really stable position, and training the upper back without other musculature being limiting factors. This is incredibly helpful, as what you don’t want is to have a client that comes in, and maybe they’ve had a total hip replacement, or they could have had a previous hamstring strain, or they could have quite a bit of low back pain. They’re coming in, and they want to train their upper back, and build strength in the lats. If the only option we have for them is a bent-over barbell row, then we’re going to have those other variables as the limiting factors, as opposed to the actual upper back musculature.
So, if you have access to a piece of equipment like this or some sort of machine that has a restraint for the actual chest level that doesn’t demand them to be using all their posterior chain muscles, then that could be a really nice way to start to apply exercise in the context of those individuals who might have some limitations. Alternatively, if you’re just an individual who wants to focus on only those upper back pulling muscles, what you’ll find sometimes is that if you had done a workout that has you doing other exercises, such as deadlifts, before this, then your glutes, hamstrings, adductors, and lower back are already going to be quite fatigued. So we might be limited if we were to do a barbell row after that, not by lat pulling musculature or upper back pulling musculature, but rather by the actual fatigue that is already set in from that previous exercise in the hip extensors and in the lower back extensors, or the spinal extensors. That’s something that’s worth paying attention to. That’s where an exercise like the prone row can come in really handy for your clients.
So, they are some tips you can use to more effectively set up the prone row, and to get more out of the exercise in general. If you need more help with your training more specifically, then we do have online coaching spaces available. If you are a coach or individual that wants to improve their nutrition coaching or become a nutrition coach, then our online nutrition course may be for you. You can stay up to date with our content by subscribing to the newsletter, and our YouTube channel.